Image Map

Let it Snow, Let it Snow, Let it Snow!


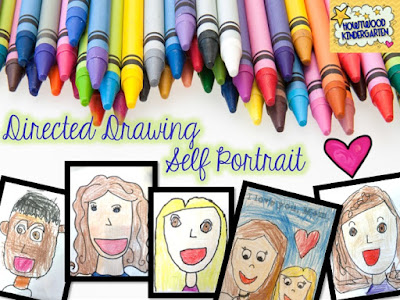
Well, here in MinneSNOWta, we're gearing up for one of the first really measurable snowstorms of the year...  So in honor of that, I found a bunch of pics of fun SNOW projects to share from my classroom!  And I'll even end with a FREEBIE!

For starters, how CUTE is this?!  I screenshot it and think it came from one of my Facebook teacher friends.  Love it, right?!  And the card is just perfect!!
Kids could have fun making these for their teachers!


Tissue Paper Collage Trees!


Next, I've done this fun art project for the past several years... it's so pretty!  For some reason, I'm always in love with anything like colorful tissue paper collages.  :)  You have to spread it over 2 days cause step 1 needs some drying time.

1.  You need big paint brushes, watered down glue, white paper, and tissue squares.  Have kids just use the glue and brushes to stick tissue squares onto paper.  Emphasize that they want to fill the spaces and brush the end down so there aren't chunks of tissue sticking up.  Also model the right amount of glue so that it dries nicely.
Love the colors!
2.  Also on day 1, use blue paint to paint a wavy line about mid-way across the paper.  Paint one half of the page blue and leave the other half white.  Let it dry.

3.    Once the tissue papers are dry (like the morning of day 2), I usually cut out the triangles.  Vary sizes and shapes a bit.  Some years if I'm feeling brave, I let kids cut their own.  Use your judgement.


4.  Finally glue on the trees, add q-tip dots of white paint, mat onto black paper and it's done!  And it's beautiful!

Last year I even got some butcher paper to make big envelopes and sent these home with kids as a holiday gift for their families.


I think this would be awesome for families to frame and bring out to display each Winter!


Snowmen at Night


Here's another cute easy project!  I think I saw the idea on Pinterest and just whipped it up to go along with  the great book: Snowmen at Night.

You can see the picture below to figure out what supplies I used.  Then just use the pictures to guide you as you put it together!  We also added some writing with the prompt: "If I were a snowman at night, I would..."  One of my teammates made that. 

I even wrote measurements on some of these for you so you don't have to guess!
Ice skate, go sledding, drink hot cocoa, go swimming... :)


Ready for another idea?!

Snowmen Handprint Ornaments!

These are all over pinterest, too!  We did these as holiday gifts for families.  It's made by painting white paint onto their little hand, having them wrap their hand around the bulb, and then once the paint dries, you use Sharpie markers to turn their sweet fingers into snowmen!  Adorable, right?! Plus it's a cute keepsake to remember how little those hands were.  I also write their name and the year on the bulb right after they made their handprint so I knew who's was who's.

I learned that you need good quality white paint (some more watery stuff I had didn't work) and also certain bulb colors are better than others... like a red bulb might give you pink snowmen.  So definitely test drive this project with your supplies in advance.

Finally, a FREEBIE!

Colorful Snow Circles!

These are awesome and SO simple.  I love brightening up grey Winter days with COLOR!

1.  Start by reading a great book about snowflakes like Snowflake Bentley or just look up great up-close pictures of snowflakes online like HERE. They really are AMAZING!
2.  Model for kids how to draw snowflakes with 6 lines.  Do an X and add another line through it.  Then add more little lines or dots on the lines.
3.  Here comes the freebie... I made a paper with 9 light grey circles on it.  Have them use white crayons in each circle.  Instruct them to press HARD.

GET THE PAPER HERE!

4.  Take watercolor paints and go over each circle in a different bright color.

5.  Be amazed as the snowflake appears!  WOW!!!


Quite possibly the BEST thing your students have EVER drawn!

https://www.teacherspayteachers.com/Product/Self-Portrait-Directed-Drawing-Beginning-or-End-of-Year-holidays-anytime-2078080 
I am STILL freaking out about how much I LOVED this project and I'm excited to share it with you because I'm sure you'll love it, too!

Over the Summer I spent a LOOOOONG time making this directed drawing show that teaches kids step-by-step how to make a really awesome self portrait.  I tested it on my kids, my nephews, my next door neighbor girls... kids from age 3 to 4th grade... and they ALL came out really beautiful in the end.  It actually sent many of the kids off on drawing tangents where they got really into art because they felt SO PROUD of what they discovered they were able to do!   Sweeties....

And finally school got going and I was able to test it out on my real class of 23 Kindergarteners.  You guessed it- MORE BIG SUCCESS!  In fact, parents were astounded that their child could be taught to draw so well!  More than one mom told me, 

"That is THE BEST thing he has EVER drawn!!!"


Here's a glimpse of my class' work and a few close ups:

Beautiful!


Yes, these are beginning-of-the-year KINDERGARTENERS!  And because of the way I set it up (all just part of the show so you can be just like me), we didn't have any tears... just lots of focused, really engaged tiny artists.  It was amazing.

So what's included?  You get 2 files: a set of 25 different paper options (details on TPT) and a gorgeous, full color show that guides everyone step-by-step through the drawing process. The show is full of detailed photos, clear explanations worded in ways that kids understand, tips and reassurance for artists, and loads of creative variations so all YOU have to do is flip through this show, one page at a time.  It's SOOOOO easy.  In case you wondered, our entire pictures from start to finish took about an hour... two 30-minute sessions with a snack break in between.

 You can find the Self Portrait Directed Drawing HERE!


AND there's more... you can even use the directions to draw 2 people side by side (special paper is included for 1 or 2 people) which makes a memorable gift for Mother's Day, Father's Day, Valentine's Day, etc!  In fact, I became friends with a students family and saw this artwork still hanging on their fridge a YEAR after we made it.  I think that's a good sign!  :)


These pictures were paired with some writing sheets you can grab in my Mother's Day Project Pack on TPT. (Note: the Mother's Day project pack is this writing paper and several other super cool Mother's Day ideas, but the directed drawing stuff is HERE... they just work well together).

 
Thanks for stopping by!  I'm sure the directed drawing is something you, your students, and their families will treasure and enjoy!

Fun Idea: Tally your local football team's wins and losses!


Here's a little something FUN to add to your calendar routine!  
Choose a favorite football team (could be your high school team or a favorite NFL team) and use tally marks to track their wins and losses as a class.  
It's HILARIOUS and so sweet how excited kids will get to tell you on Monday how the team did!  And there's usually one or two kids who are REALLY into football and can give you serious details about the game.  I learn a lot from them and can take that info home to impress my husband!  Ha!
I recommend football more than other sports like baseball or basketball because those others have too many games to track.  Football is just right with about a game per week.  
The scores are perfect for talking about which number is greater and less than, etc.  
So there ya go- just a FUN idea!

We are Fam-i-ly!

 Here's a simple idea you can start up anytime of year to strengthen the bond between home and school. Invite families to send in a 4x6 family photo!
I LOVE this wall and all that it symbolizes!
I just cut a bunch of 6x8 black rectangles of paper and kept them handy and then as kids brought in pics, I mounted them on the black background (helps them all look the same size cause some sent in bigger or smaller pics) and popped them up on the wall. 
I did this at the start of the year and feel like it helped ease the transition between home and school. I had a few missing mom and they loved being able to see her picture if they wanted to. 
I also think it just sends powerful messages like: families are important, we care & want to get to know each other, families and classrooms work together, and so much more! 
Try it out any time of year and show them all you care!

Colorful & Fun WOW Work Display!

How fun, happy, and simple is this? All you need is a couple pieces of 12x12 scrapbook paper, some clothes pins, and maybe some cute tape to cover the clothes pins!
AND if any of you out there are dealing with lovely BRICK walls like me, I hope you know the glue gun trick! I'm tellin ya, you can tape and retape with all kinds of tape onto those dang bricks, but if you get gutsy and grab the glue gun, that's going to be your BEST bet. The glue peels off when you're done with it, but it holds those hard-to-hang items better than tape. You're welcome.  And if you have real walls you can staple or pin into... Count your blessings! ;)

I'm BAAAAACK!

Whew!  It's been a LONG TIME since I've blogged!  So long in fact that I completely forgot how to log in to my poor neglected, yet still awesome blog!  After wasting spending about 2 hours trying to crack the code and discover a way back in, I told myself, "Hey! It's time for a FRESH start!"  So here I am!  I'm so glad you found me! 
My old blog is HERE if you're interested in seeing my past posts.
And I also have THIS related website I created and pay for the domain name on just because I wanted to have a one-stop-shop where my students could find all the BEST ad-free, top quality educational games, songs, and videos!  Please feel free to use it with your kids... it's made to share!
And finally, speaking of sharing, I love sharing ideas and products with other teachers so you can zip straight to my store on Teachers Pay Teachers HERE.